Configuring OAuth
Using OAuth requires configuration in the Turnkey Dashboard and in your app.
Enabling OAuth
Navigate to the Wallet Kit section in the Turnkey Dashboard and enable OAuth. If you have not enabled the Auth Proxy, enable it first. See Getting Started for details.

Configuring OAuth providers
Enable the providers you want to use under Social logins.
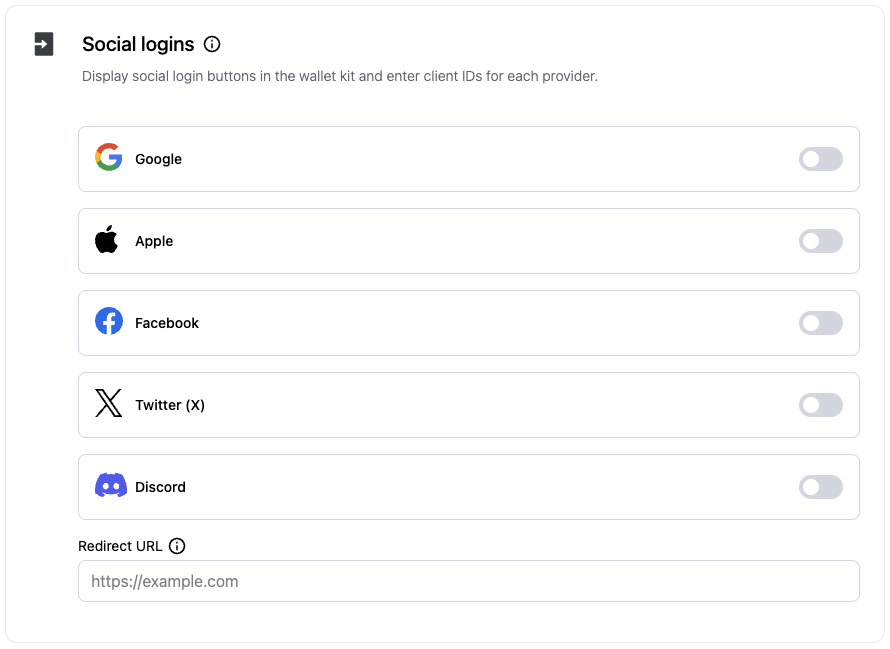
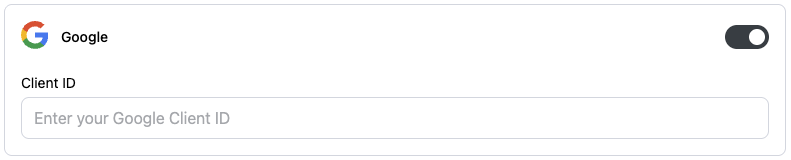
Client IDs
You can enter client IDs for each provider and the redirect URL directly in the dashboard:
 Or provide client IDs and the redirect URI through your app configuration and pass them to the
 TurnkeyProvider.
For OAuth 2.0 providers, you will need to upload the client ID and secret in the dashboard. See the OAuth 2.0 providers section below for details.
Client configuration
If you prefer configuring via code, provide your client IDs and optional redirect URI through TurnkeyConfig.authConfig.oAuthConfig, and set an appScheme to complete deep links.
final turnkeyProvider = TurnkeyProvider(
  config: TurnkeyConfig(
    // ... your existing config ...
    appScheme: 'myapp', // Required for OAuth deep link completion
    authConfig: AuthConfig(
      oAuthConfig: OAuthConfig(
        // Note: If no redirect URI is provided, the default redirect URI will be used: https://oauth-redirect.turnkey.com. This url must be configured to redirect back to your app!
        oauthRedirectUri: '<YOUR_REDIRECT_URI>', // Optional: e.g., "https://your-app.com/oauth-callback"

        // Client IDs from your provider dashboards
        googleClientId: '<YOUR_GOOGLE_CLIENT_ID>',
        appleClientId: '<YOUR_APPLE_CLIENT_ID>',
        facebookClientId: '<YOUR_FACEBOOK_CLIENT_ID>',
        xClientId: '<YOUR_X_CLIENT_ID>',
        discordClientId: '<YOUR_DISCORD_CLIENT_ID>',
      ),
    ),
  ),
);
App scheme configuration (deep links)
Register your app scheme on each platform to complete the OAuth flow.
iOS (Info.plist)
<key>CFBundleURLTypes</key>
<array>
    <dict>
        <key>CFBundleURLName</key>
        <string>myapp</string>
        <key>CFBundleURLSchemes</key>
        <array>
            <string>myapp</string>
        </array>
    </dict>
</array>
Android (AndroidManifest.xml)
android/app/src/main/AndroidManifest.xml
<intent-filter>
    <action android:name="android.intent.action.VIEW" />
    <category android:name="android.intent.category.DEFAULT" />
    <category android:name="android.intent.category.BROWSABLE" />
    <data android:scheme="myapp" android:host="" />
</intent-filter>
myapp with your actual scheme and ensure it matches appScheme in TurnkeyConfig.
Usage
Call the helper for each provider from your TurnkeyProvider instance: handleGoogleOauth, handleAppleOauth, handleFacebookOauth, handleDiscordOauth, and handleXOauth.
lib/screens/social_logins.dart
import 'package:flutter/material.dart';
import 'package:provider/provider.dart';
import 'package:turnkey_sdk_flutter/turnkey_sdk_flutter.dart';

class SocialLoginButtons extends StatelessWidget {
  const SocialLoginButtons({super.key});

  @override
  Widget build(BuildContext context) {
    final tk = Provider.of<TurnkeyProvider>(context, listen: false);

    Future<void> run(Future<void> Function() fn) async {
      try {
        await fn();
        // onSessionSelected in TurnkeyConfig can handle navigation on success
      } catch (e) {
        ScaffoldMessenger.of(context).showSnackBar(
          SnackBar(content: Text('Error: $e')),
        );
      }
    }

    return Column(
      crossAxisAlignment: CrossAxisAlignment.stretch,
      children: [
        ElevatedButton(
          onPressed: () => run(tk.handleGoogleOauth),
          child: const Text('Continue with Google'),
        ),
        ElevatedButton(
          onPressed: () => run(tk.handleAppleOauth),
          child: const Text('Continue with Apple'),
        ),
        ElevatedButton(
          onPressed: () => run(tk.handleFacebookOauth),
          child: const Text('Continue with Facebook'),
        ),
        ElevatedButton(
          onPressed: () => run(tk.handleDiscordOauth),
          child: const Text('Continue with Discord'),
        ),
        ElevatedButton(
          onPressed: () => run(tk.handleXOauth),
          child: const Text('Continue with X'),
        ),
      ],
    );
  }
}
Provider details
OAuth providers
Google
Requirements:
- Dashboard: enable Google in Wallet Kit → Authentication.
- Client ID: Web client ID from the Google developer console, set in the Dashboard or via
OAuthConfig.
Usage:
await context.read<TurnkeyProvider>().handleGoogleOauth();
Apple
Requirements:
- Dashboard: enable Apple.
- Client ID: Apple Services ID, set in the Dashboard or via
OAuthConfig.
- Redirect URI must match your configured value (e.g.,
myapp://).
Usage:
await context.read<TurnkeyProvider>().handleAppleOauth();
Facebook
Requirements:
- Dashboard: enable Facebook.
- Client ID: set in the Dashboard or via
OAuthConfig.
- Redirect URI must match your configured value (e.g.,
myapp://).
Usage:
await context.read<TurnkeyProvider>().handleFacebookOauth();
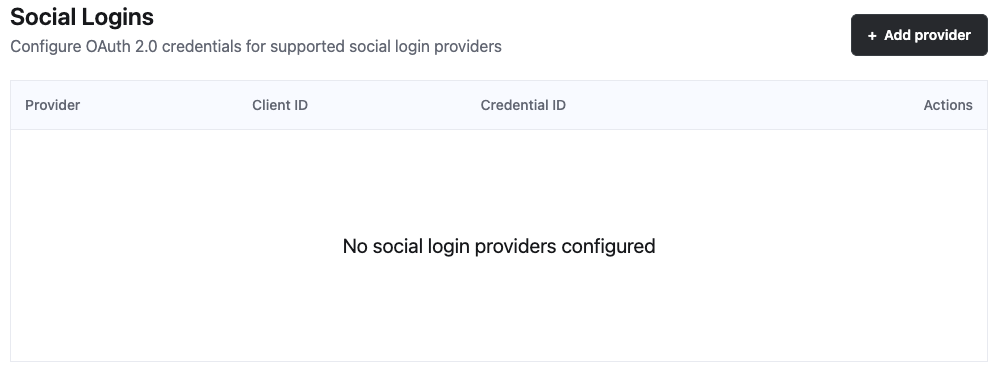
OAuth 2.0 providers
For providers that use OAuth 2.0 (e.g., X, Discord), configure additional settings in the Turnkey Dashboard.
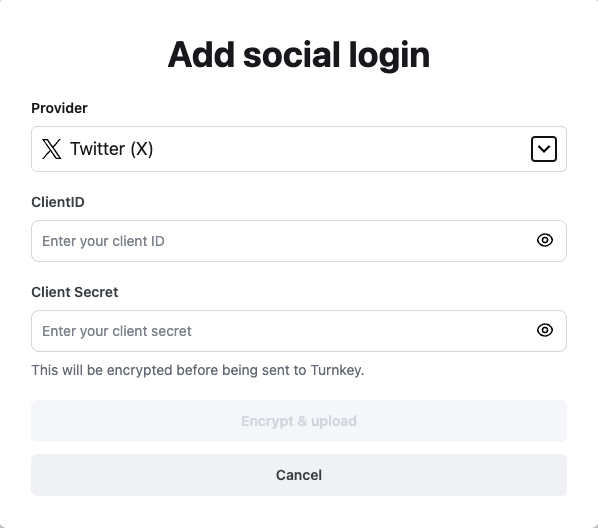
In Wallet Kit → Socials, click Add provider.
 Select the provider and fill in the required fields from the provider console. Secrets are encrypted on upload.
 Then go to Authentication and enable the provider under SDK Configuration.
 Click Select to choose your newly added client ID, then Save Settings. Alternatively, enter the client ID through
 OAuthConfig.
Discord
Requirements:
- Dashboard: enable Discord (OAuth 2.0).
- Client ID: set in Dashboard or via
OAuthConfig.
- Redirect URI must match your configured value (e.g.,
myapp://).
Usage:
await context.read<TurnkeyProvider>().handleDiscordOauth();
- Dashboard: enable X (OAuth 2.0).
- Client ID: set in Dashboard or via
OAuthConfig.
- Redirect URI must match your configured value (e.g.,
myapp://).
Usage:
await context.read<TurnkeyProvider>().handleXOauth();